Introduction
Knitting, at its core, is a binary system of interlocking loops created with two fundamental stitches. The successful creation of a knitted fabric, from a simple dishcloth to a complex garment, relies on a mastery of three sequential actions: the strategic selection of tools, the engineering of a stable foundation through casting on, and the precise execution of the knit and purl stitches. This report provides an in-depth analysis of these foundational elements, moving beyond superficial instruction to explore the structural mechanics and practical implications of each choice and action. The objective is to equip the practitioner with the technical understanding required to not only replicate patterns but to control and manipulate knitted fabric with intention and precision.
Section 1: The Strategic Selection of Foundational Tools
The efficacy of a knitter’s work is directly correlated to the appropriateness of their tools. While a vast market of knitting implements exists, a beginner’s toolkit requires only four non-negotiable items: needles, yarn, scissors, and a tapestry needle. [1][2] The initial choice of needles is critical for ergonomic comfort and stitch control. Needles are primarily categorized by material and size. Bamboo or wood needles are highly recommended for novices due to their surface texture, which provides a slight grip on the yarn, preventing stitches from inadvertently sliding off. [3][4] Metal needles, conversely, offer a slicker surface that facilitates speed, a feature best leveraged by experienced knitters with established tension control. Needle size, typically measured in millimeters or a corresponding US size, should be selected in conjunction with the yarn. For a first project, a medium size, such as US 6 (4.00 mm) to US 8 (5.00 mm), offers a balance between being substantial enough to handle comfortably and small enough to avoid being cumbersome. [3]
The yarn selection is equally critical. A medium-weight yarn, classified as “worsted” or “Category 4,” is the industry standard for learners. [4] Its thickness allows for clear visibility of the stitch structure, making it easier to identify errors and understand the fabric’s construction. Fiber choice impacts the knitting experience; the natural elasticity of wool is forgiving of the tension inconsistencies common in beginners, while a smooth, light-colored, solid yarn maximizes the visibility of individual stitches. [4] Finally, while scissors are a self-evident necessity, the tapestry needle—a blunt, large-eyed needle—is indispensable for the final stage of any project: weaving in the loose yarn ends to ensure structural integrity and a professional finish. [2][4]
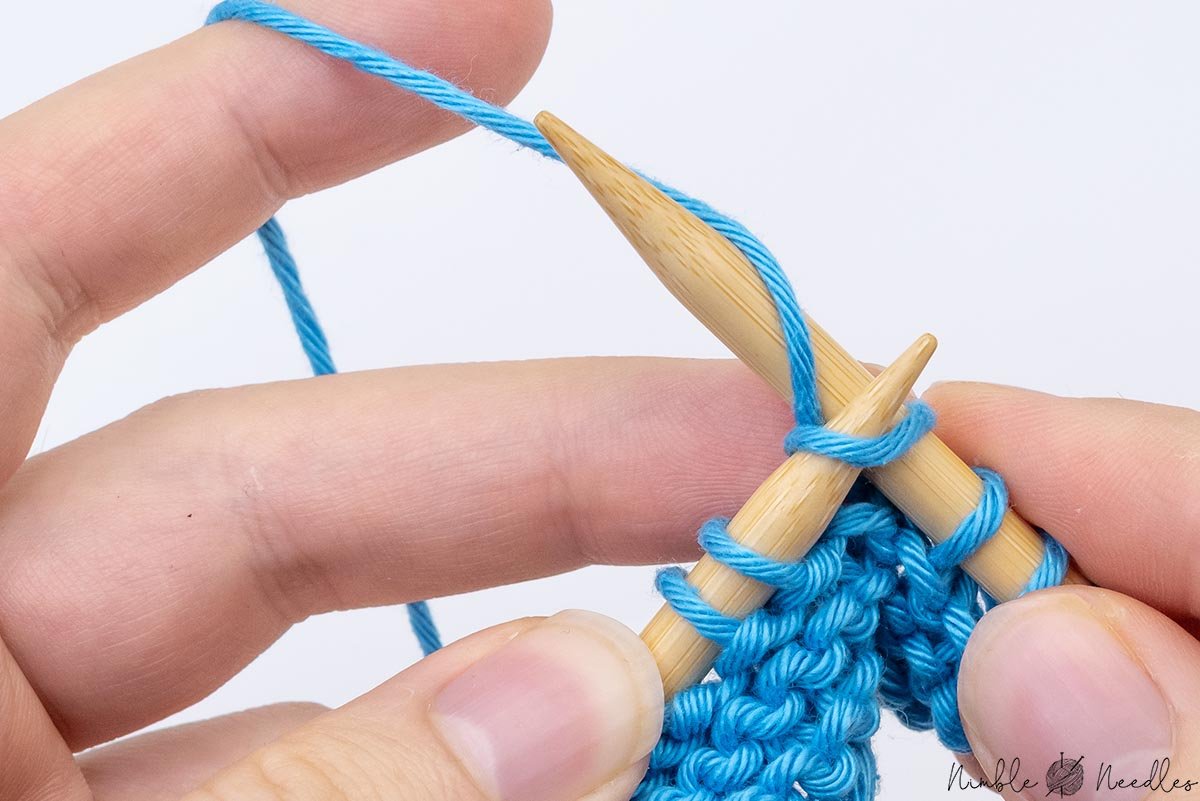
Section 2: The Cast-On: Engineering the Project’s Foundation
The cast-on is the process of creating the initial row of live stitches and serves as the architectural foundation of the entire knitted piece. Among numerous methods, the Long-Tail Cast-On is widely regarded as the most versatile and functional for beginners, producing a durable, attractive, and elastic edge suitable for most projects. [5][6] This method requires two strands of yarn: the working yarn from the ball and a “long tail.” [6] The primary technical challenge lies in accurately estimating the required length of this tail; a common and reliable rule is to measure a length three to four times the desired width of the finished project. [6][7]
The execution involves a specific set of hand movements, often referred to as the “slingshot” position, where the thumb and index finger separate the two strands of yarn. [7][8] A new stitch is formed by maneuvering the needle tip under the thumb strand, then over and under the index finger strand, and finally bringing the new loop through the thumb loop. [7] The most critical factor for a successful cast-on is maintaining consistent tension. Each stitch should be snugged up to the needle by pulling on the thumb (tail) yarn, which tightens the knot at the base of the stitch, rather than the index finger (working) yarn, which would tighten the loop on the needle itself. [9] Inconsistent tension during the cast-on will result in a flared or puckered edge, a structural flaw that cannot be corrected later and compromises the final dimensions and appearance of the work. [9][10] While other methods exist, the Long-Tail Cast-On’s structure, which is identical to a backward loop cast-on plus a row of knitting, provides a stable and less-prone-to-stretching base. [7]
Section 3: The Binary Code of Knitting: The Knit and Purl Stitch
All knitted fabric is constructed from a binary code of two stitches: the knit stitch and the purl stitch. They are, in essence, mirror images of each other, and their combination dictates the fabric’s texture, drape, and behavior. [11][12] The physical difference lies in the motion and the placement of the yarn. For a knit stitch, the working yarn is held to the back of the work, and the needle is inserted into the front of a loop, from left to right, pulling a new loop through to the front. [11] The resulting stitch presents a smooth ‘V’ shape on the side facing the knitter. [12] When every row is worked in the knit stitch, the resulting fabric is Garter Stitch. This fabric is reversible, highly elastic, and lies flat, making it structurally stable and ideal for items like scarves and blankets where curling is undesirable. [13][14]
The purl stitch is the mechanical opposite. The working yarn is held to the front of the work, and the needle is inserted into the front of a loop from right to left, pushing a new loop through to the back. [11] This action creates a characteristic horizontal “bump” or “ridge” at the base of the stitch on the side facing the knitter. [11][15] The true power of knitting is unlocked when these two stitches are combined. Alternating one row of knit stitches with one row of purl stitches produces Stockinette Stitch, the fabric most commonly associated with machine-knitted garments. [14][15] It features a smooth ‘V’ side (the knit side) and a bumpy purl side. [16] However, this fabric possesses an inherent structural imbalance. Because knit stitches are slightly shorter and narrower than purl stitches, having all the knits on one face and all the purls on the other causes the fabric to curl dramatically at the edges. [17][18] This is not a flaw in technique but a physical property of the fabric’s structure. [18] Understanding this allows knitters to strategically add non-curling borders (like Garter stitch or Ribbing) to stockinette projects to ensure they lie flat. [19][20] Combining knits and purls within the same row creates textured, elastic fabrics like Ribbing (e.g., K1, P1) and Seed Stitch (alternating K1, P1 on every row), which are fundamental to garment construction. [21][22]